Pentheus: Installation


After learning about some new low-barrier-to-entry AI models, I've decided to dedicate my gaming PC to be the family server. It's got a GPU and decent RAM- Enough that I could conceivably run a conversational AI locally. But to get to there, we have to start from here.
Install Debian
Obviously, the computer's gonna need an OS. Some other time I'll go over creating and using a LiveUSB, but for now all we need to document is that the hostname was set to pentheus.thebes, we used the entire disk with no separate partition, and we included GNOME, webserver, and ssh server from the install list.
Beyond that, there's a few steps that aren't really installations, but configurations- Like signing into Firefox.
Custom Shortcuts
If we do intend to use the GUI from time to time, don't forget these creature comforts. We're not going to be able to change them on every windows machine we find, so we'll tend toward the windows defaults.
- Custom Shortcuts>gnome-terminal (Super+T, Ctrl+Alt+T)
- Launchers>Home folder (Super+E)
- Screenshots>Take a screenshot interactively (Super+Shift+S)
- System>Lock screen (Super+L)
- Show Desktop; Navigation>Hide all normal windows (Super+D)
Sudo Power
As ever, we must become a Super User DOer. Note that the second echo attempt fails- You must log out and back in to get the benefits of your newfound power. If we're connected directly, we might want to use Ctrl+Alt+F3 to access a text only terminal to sign in as root. Then return to the graphical session with Ctrl+Alt+F2.
crow@pentheus:~$ sudo echo "hi"
crow is not in the sudoers file.
crow@pentheus:~$ su -
root@pentheus:~# usermod -aG sudo crow
root@pentheus:~# exit
crow@pentheus:~$ sudo echo "hi"
crow is not in the sudoers file.
crow@pentheus:~$ exit
Connection to pentheus.local closed.
crow@tiresias:~$ ssh pentheus.local
crow@pentheus:~$ sudo echo "hi"
hi
If we have loaded a graphical session, we should log out and log back in.
Prevent Sleep
When installing Debian with a GNOME GUI (which can often be handy even if the machine will be primarily headless), the default settings will put the system to sleep after a certain amount of time. While sleeping you can't connect via SSH, totally defeating the point of a headless server. Let's fix that.
crow@pentheus:~$ sudo systemctl mask sleep.target suspend.target hibernate.target hybrid-sleep.target
Created symlink '/etc/systemd/system/sleep.target' → '/dev/null'.
Created symlink '/etc/systemd/system/suspend.target' → '/dev/null'.
Created symlink '/etc/systemd/system/hibernate.target' → '/dev/null'.
Created symlink '/etc/systemd/system/hybrid-sleep.target' → '/dev/null'.
crow@pentheus:~$ sudo systemctl status sleep.target suspend.target hibernate.target hybrid-sleep.target
○ sleep.target
Loaded: masked (Reason: Unit sleep.target is masked.)
Active: inactive (dead)
Webserver
It's nice to have a homepage on the server to keep track of what services are available or planned. There are better ones, but the default included in Debian's installation is GoodEnoughTM, so let's use that. It should already look like this:
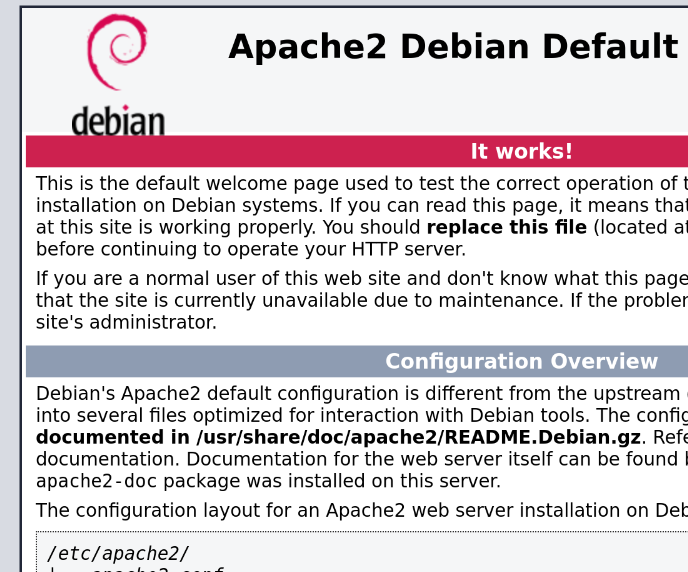
I like to name machines after mythological figures, which usually means there's a royalty free image available on wikipedia. We'll whip together a layout with bootswatch, consolidate the js and css dependencies into one file each, and prominently feature the image. Really this is just a place to check if the server is up and link to services.
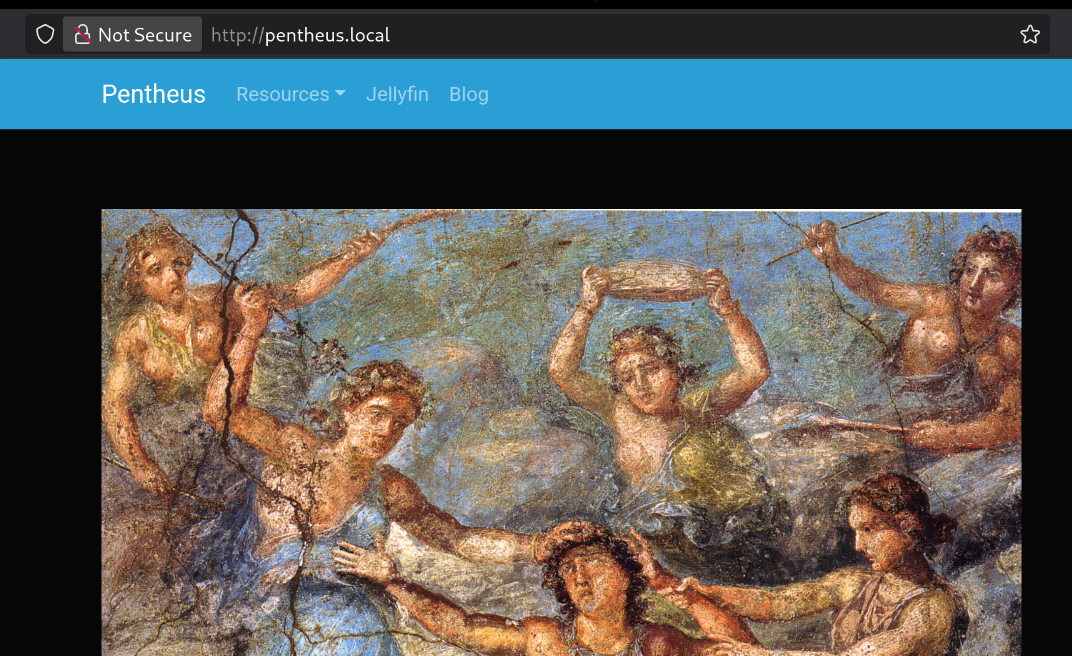
<!--/var/www/html/index.html -->
<!DOCTYPE html> <html lang="en"> <head> <meta charset="utf-8"> <title>Pentheus</title> <link rel="stylesheet" href="./custom.css"> </head> <body> <div class="navbar navbar-expand-lg fixed-top bg-primary" data-bs-theme="dark"> <div class="container"> <a href="http://pentheus.local" class="navbar-brand">Pentheus</a> <button class="navbar-toggler" type="button" data-bs-toggle="collapse" data-bs-target="#navbarResponsive" aria-controls="navbarResponsive" aria-expanded="false" aria-label="Toggle navigation"> <span class="navbar-toggler-icon"></span> </button> <div class="collapse navbar-collapse" id="navbarResponsive"> <ul class="navbar-nav"> <li class="nav-item dropdown" data-bs-theme="light"> <a class="nav-link dropdown-toggle" data-bs-toggle="dropdown" href="#" id="resources">Resources</a> <div class="dropdown-menu" aria-labelledby="resources"> <a class="dropdown-item" target="_blank" href="http://pentheus.local:8096/">Jellyfin</a> </div> </li> <li class="nav-item"> <a class="nav-link" target="_blank" href="http://pentheus.local:8096/">Jellyfin</a> </li> <li class="nav-item"> <a class="nav-link" href="https://blog.crow1170.com/">Blog</a> </li> </ul> </div> </div> </div> <div class="container"> <div class="page-header" id="banner"> <div class="row"> <div class="col-lg-8 col-md-7 col-sm-6"> <img width="100%" src="https://upload.wikimedia.org/wikipedia/commons/c/c1/Pompeii_-_Casa_dei_Vettii_-_Pentheus.jpg" /> </div> </div> </div> </div> <script src="./custom.js"></script> </body> </html>
I realize that link doesn't do anything yet, but it's okay to plan ahead.
Networking
Next up, let's configure our networking.
Firewall
It will be important to check the status of the firewall before configuring the rules, lest we break our own connection. We'll default to denying traffic (incoming and outgoing), then open up ssh and http.
crow@pentheus:~$ sudo apt install ufw
crow@pentheus:~$ sudo ufw status
Status: inactive
crow@pentheus:~$ sudo ufw default deny incoming
sudo ufw default allow outgoing
Default incoming policy changed to 'deny'
(be sure to update your rules accordingly)
Default outgoing policy changed to 'allow'
(be sure to update your rules accordingly)
crow@pentheus:~$ sudo ufw allow ssh
Rules updated
Rules updated (v6)
crow@pentheus:~$ sudo ufw allow http
Rules updated
Rules updated (v6)
Now we'll carve out space for local services (jellyfin, ersatztv, qbitnox, respectively). Then we'll switch the firewall on and double check that it turns on by default.
crow@pentheus:~$ sudo ufw allow from 192.168.0.0/16 to any port 8096
crow@pentheus:~$ sudo ufw allow from 192.168.0.0/16 to any port 8409
crow@pentheus:~$ sudo ufw allow from 192.168.0.0/16 to any port 8080
crow@pentheus:~$ sudo ufw enable
Command may disrupt existing ssh connections. Proceed with operation (y|n)?
Firewall is active and enabled on system startup
crow@pentheus:~$ sudo systemctl enable ufw
Synchronizing state of ufw.service with SysV service script with /usr/lib/systemd/systemd-sysv-install.
Executing: /usr/lib/systemd/systemd-sysv-install enable ufw
Mullvad VPN
A VPN connection ensures some privacy from our ISP and State government. It's not carte blanche, but it is good practice. I recommend Mullvad, and they have straightforward instructions and an easy to use program. It's an interesting dynamic using only an account number rather than a user:pass pair.
crow@pentheus:~$ sudo curl -fsSLo /usr/share/keyrings/mullvad-keyring.asc https://repository.mullvad.net/deb/mullvad-keyring.asc
crow@pentheus:~$ echo "deb [signed-by=/usr/share/keyrings/mullvad-keyring.asc arch=$( dpkg --print-architecture )] https://repository.mullvad.net/deb/stable stable main" | sudo tee /etc/apt/sources.list.d/mullvad.list
crow@pentheus:~$ sudo apt update
crow@pentheus:~$ sudo apt install mullvad-vpn
crow@pentheus:~$ mullvad account login ****************
Error: There are too many devices on the account. One must be revoked to log in
Clear enough error message here. To resolve, we just have to use the web app to make space by removing unused devices. As we proceed, we'll make sure to preserve our LAN ssh connection before connecting.
crow@pentheus:~$ mullvad account login ****************
crow@pentheus:~$ mullvad relay list
crow@pentheus:~$ mullvad relay set location br-sao-wg-201
crow@pentheus:~$ mullvad lan set allow
crow@pentheus:~$ mullvad auto-connect set on
crow@pentheus:~$ mullvad connect
crow@pentheus:~$ mullvad lockdown-mode set on
crow@pentheus:~$ curl https://am.i.mullvad.net/connected
You are connected to Mullvad (server br-sao-wg-201). Your IP address is ***.***.***.***
Jellyfin
Our goal tonight is to watch a movie on a streaming device (Xbox, let's say). We'll need a movie first, so let's copy our ripped DVD.
SFTP
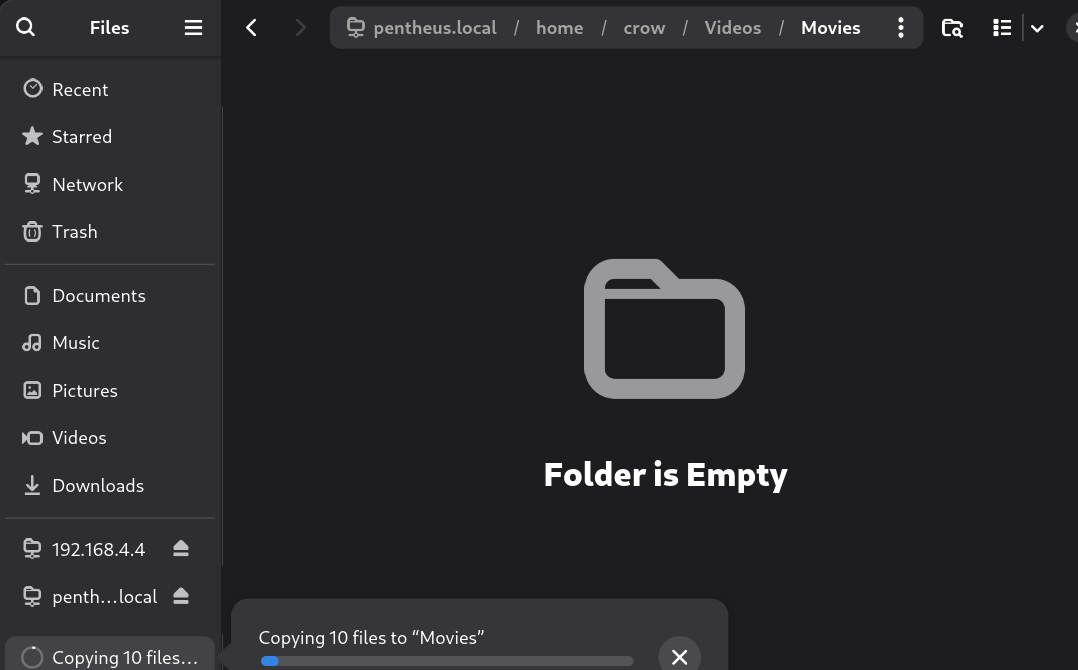
We'll start by putting a movie in the Videos folder according to Jellyfin's recommended directory structure. (The idea to include the imdb id in the folder name is probably the single most valuable suggestion I've seen!) To do this, we'll open up the file browser on another machine and connect to pentheus via sftp by typing in the address at the bottom of the Network folder:
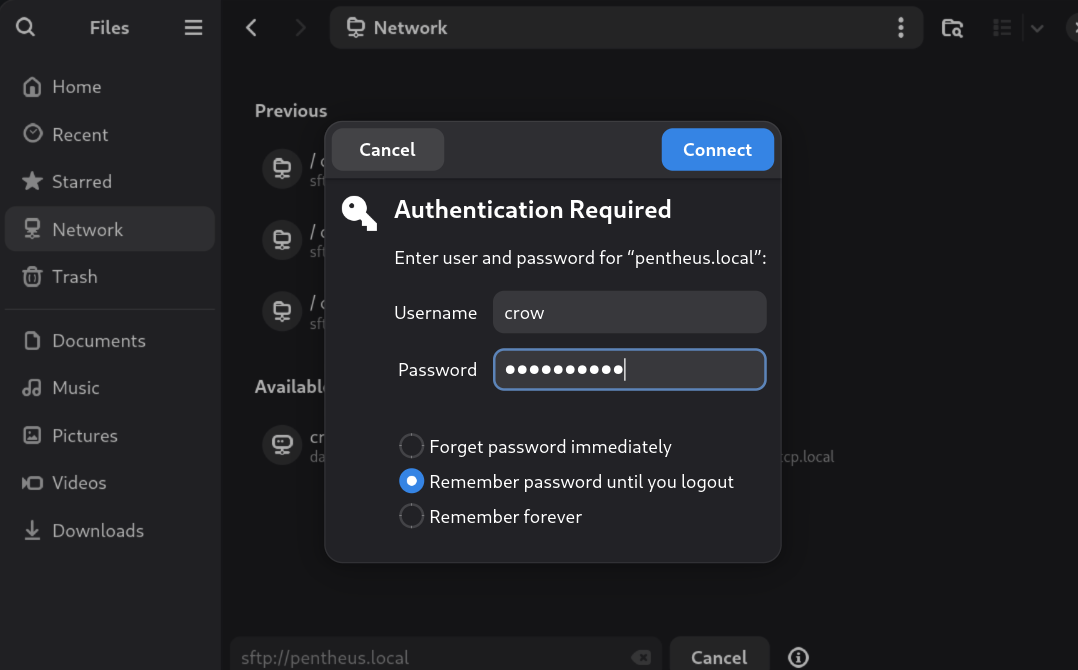
Then we'll be able to drag and drop files. It's not the fastest file transfer option per bit, but it is easy to set up and get this first file on there. You can even move a file from one server to another:
Docker
Great. Now we'll set up Docker. We're going to copy some code from the Docker website. It's nice that we can paste in the whole mess instead of going line by line. Even the comments are okay to leave in.
crow@pentheus:~$ # Add Docker's official GPG key:
sudo apt update
sudo apt install ca-certificates curl
sudo install -m 0755 -d /etc/apt/keyrings
sudo curl -fsSL https://download.docker.com/linux/debian/gpg -o /etc/apt/keyrings/docker.asc
sudo chmod a+r /etc/apt/keyrings/docker.asc
# Add the repository to Apt sources:
sudo tee /etc/apt/sources.list.d/docker.sources <<EOF
Types: deb
URIs: https://download.docker.com/linux/debian
Suites: $(. /etc/os-release && echo "$VERSION_CODENAME")
Components: stable
Architectures: $(dpkg --print-architecture)
Signed-By: /etc/apt/keyrings/docker.asc
EOF
sudo apt update
[sudo] password for crow:
That gets us the repository set up and curl installed (which will also be handy in the future).
crow@pentheus:~$ sudo apt install docker-ce docker-ce-cli containerd.io docker-buildx-plugin docker-compose-plugin
Compose
Alright, we'll make the folders and file as mentioned from the horse's mouth, then run the app and configure in the Web UI. We'll run with sudo docker compose up -d and then circle back after making our webpage.
crow@pentheus:~$ mkdir -p jellyfin/config
crow@pentheus:~$ mkdir -p jellyfin/cache
crow@pentheus:~$ cd jellyfin
crow@pentheus:~/jellyfin/$ vim docker-compose.yml
#jellyfin/docker-compose.yml
services:
jellyfin:
image: jellyfin/jellyfin
container_name: jellyfin
ports:
- 8096:8096/tcp
- 7359:7359/udp
volumes:
- /home/crow/jellyfin/config:/config
- /home/crow/jellyfin/cache:/cache
- type: bind
source: /home/crow/Videos
target: /media
restart: 'unless-stopped'
crow@pentheus:~/jellyfin/$ sudo docker compose up -d
And just like that, the link we made earlier will take us to the port that jellyfin is on:
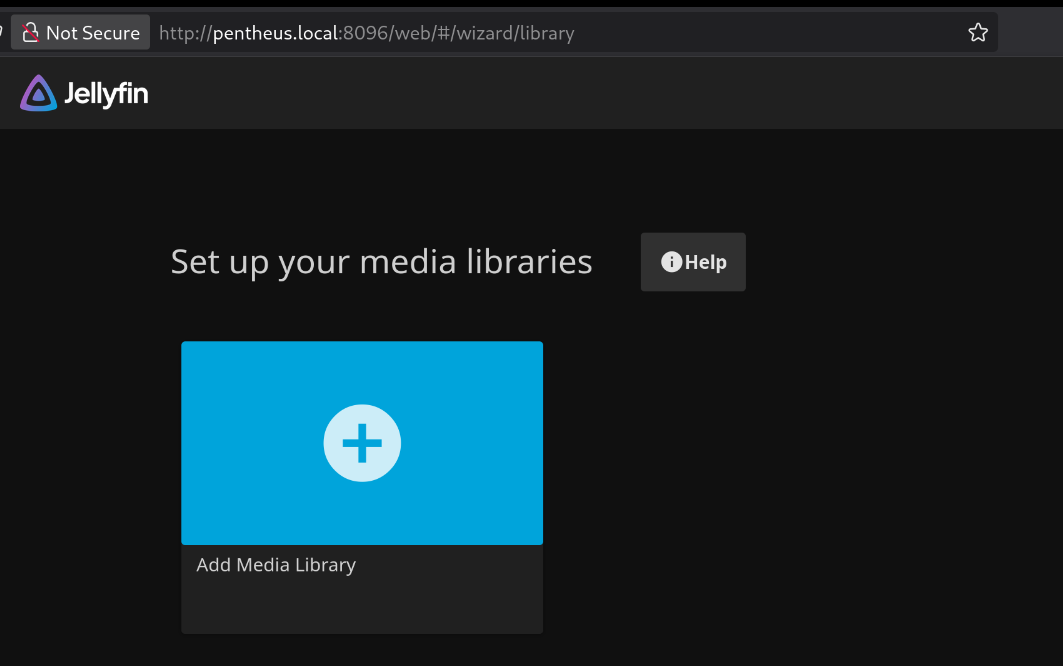
It was important to get the file in place first because we'll need the path to exist in order to add it to jellyfin.

And that's enough for one night, I reckon. Pop some corn and we'll do more tomorrow.